|
EQUINE CLICKER TRAINING..... using precision and positive reinforcement to teach horses and people |
 |
|
Ways to Use Cones in Liberty or Lunging Work
Over the years as I have played with clicker training, round pen and liberty work, I have found that the use of cones can greatly clarify and accelerate the learning process of horses when they start this type of work. You can use the cones to help your horse understand about going out, staying out and changing direction. In addition, if your horse becomes really good at using the cones for guidance, you can use them to easily train jumping and obstacle courses.
When I started writing this article, I thought it would be a description of how to set up cones to help your horse learn turns and balance, and how to teach the horse to work the cones. But then I realized that what I really wanted to write was the story of how my use of cones has changed and evolved and how much it has helped my horses. So, this article is not going to focus on detailed descriptions and instructions for each cone exercises, but instead I am going to share examples of my training exercises and progression over the years. If you want more details, or encounter problems, I am happy to provide more specifics if you email me. I think that the fun in this work is playing around with it and seeing what works and what doesn't. It is not about setting up one exercise and using it for every horse. I find that I adjust the cone work for each of my horses depending upon what we need to work on, and that I enjoy the variety and challenge of setting things up in different ways.
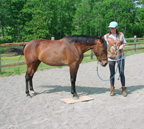
The first time I really started playing with cones was the summer I decided to teach Rosie to lunge. Rosie was two and I just wanted to get her used to the idea of going out around me at the walk and trot. But having spent a whole year being glued to my side while clicker training, she was obviously reluctant to go away from me. In addition, she was worried about a lot of things and anxious about scary things outside the ring. One day I just decided to make a ring of cones and have her walk on one side of them and I would walk on the other. I clicked her for staying on her side. It sounds easy, but I have to say that she stomped on a lot of cones and did a lot of drifting on to my side. She did eventually get it and then I slowly took out cones until there were just a few markers. It worked pretty well and I got her so that I could send her out and once around. I never did bother to totally get rid of the cones, or to get her to do too many circles. She was still young and I just wanted to give her the idea that this was something she could do.
There are different ways to set up the cones for this exercise. In the very beginning, you want the cones close together so they almost form a wall. Since you are working at a walk, this is not difficult for the horse as long as the circle is not too small. If you don't have enough cones, you could mark half the circle really well and then just mark the other side with a few. Instead of continuing on around the circle after a click, you would reset the horse back to the beginning of the line. Once the horse understood, you could keep him going and reinforce him for staying out on the side with fewer cones. These are just some ideas. Once Rosie had the idea, I chose to move the cones farther apart and go to a larger circle. I walked around with her. I found it quite easy to stay more and more in the center as she learned the exercise and eventually she got used to working farther out away from me.
I found myself using cones again the next summer after I learned about round pen work at one of Alexandra Kurland's clicker clinics. We spent a whole clinic (3 days) teaching ourselves and our horses how to do some basic round pen work, clicker style. Most of the attendees (horse and human) had not done round pen work before so we started with the basics and worked up from there. We spent a lot of time on the mechanics of how the trainer needed to move around the pen and it was time well spent. When we started training horses, we avoided a lot of confusion on their part by having already learned how to be clear in our intent and body language.
Alex's guidelines for starting round pen work were pretty simple. Step 1 was to get the horse going around the outside of the ring without constant nagging. If you want to be able to ask the horse to do something new, you need the horse to understand that he keeps going until you ask for something else. Otherwise you spend all your time nagging him and can't ask for something else. We learned to stand (or walk in a small circle) in the center and follow the horse with our body and whip. We clicked the horses for continuing around the outside.
Step 2 was to teach inside turns. At this time, Alex was studying Clinton Anderson's work and he focuses on inside turns. So, once the horses were working around the outside, we started asking for inside turns. Inside turns are great exercises for teaching horses to focus on the trainer and learn to bend and balance around turns. Alex uses them to teach horses how to organize their own bodies to find balanced movement. We had horses and trainers of many different levels, so we broke this down into different pieces as needed for each horse/trainer combination. We clicked for various steps along the way until the horses were fluidly changing from one direction to the other. This is as far as we got that weekend, but it was enough to get me started.
When I came home, I spent the rest of the summer doing some round pen work with Willy (who had attended the clinic) and Rosie, who had not. Willy had a traditional background before he came to me, and he is a a very forward horse (to put it mildly). He had no problem with the idea of going out and around the circle. But he did tend to cut in and there was usually one really squashed side to his circle. I spent some time teaching him to move out off a whip and body language cue, but he didn't seem to catch on and just stay out. So I set up a line of cones, making a laneway between them and the edge of the ring. He got clicked for staying in the laneway. It took him a while to catch on, but I can still remember the day when he walked around and clearly adjusted his path to go into the laneway. I kept it up for most of the summer although I slowly took away cones. In addition to keeping him out on the circle, the cones helped him learn that when I pointed the whip at his shoulder, he needed to move out. I would use the whip to ask him to enter the laneway if he looked like he was drifting in. Later we were able to generalize this so he would move out when I pointed the whip at his shoulder.
With Rosie, I found things to be a little tougher. Her sole experience with lunging had been the little work I had done earlier. She had the basic idea, but she was not as good about continuing to go around the outside and she would also cut in. So I used the line of cones with her too, and I think it really helped her connect the previous lunge work with the new round pen work. In addition to using the cones to help her stay out, I used them to mark how far she needed to go. So she learned to look for the next cone as a "clickable place" and it helped her to remain focused ahead instead of always asking if she could stop yet.
Then I forgot about the cones for a while. I was doing other things and I had them in the ring, but I used them for marking turns for my daughter or playing games. Then last winter (2003-2204), I was lunging Willy one day and he veered to go out around a cone. Lunging Willy was an ongoing project. He had never lunged very well, especially at the canter and I was using lunging as a warm-up before riding him. His trot had improved a lot and he was bending pretty nicely but his canter was fast and stiff and he did a lot of bucking. I was working on head down at the canter to try and get him to relax as he was very inverted, but he still did a lot of bucking and went fast and leaned on his inside shoulder. When he went around the cone, it made me think. It seemed to be a way to get him to turn without putting pressure on the lunge line. I spent the rest of the winter playing with this.
I eventually went from sending him out around one cone to creating a cone gate which is two cones placed close together that he needed to go through. I found I could make the distance between the cones quite narrow and he could still get between them. Now that I think about it, I had done some work with cone gates at the walk and trot the summer before. I was teaching him 3 flip 3 and used the cones to make gates to ride through. So when I added a gate to the canter work, he already had some idea what we were doing. What was interesting is that the cone gate totally changed his approach to cantering. It gave him a focus, an end point, and it made him have to organize his body to make the turn. In the beginning, he would dive through the turn on his inside shoulder, but over time I could see him focus on the cones and adjust his path to go between them. He started to bend. In addition, he knew if he could canter through the cones without bucking, he would get clicked. So now he knew how far he had to canter and he stopped worrying so much about the canter. Another benefit to this is that he started stopping for his click at the canter. Prior to using the cone gates, he didn't always stop. I don't know if he was so emotional he couldn't hear me, or if he just didn't want to stop but once he starting working through the gates, his response to the click improved.
Once he was solid at cantering the cones on the lunge, I used the same exercise under saddle. I would work him on a circle with one set of cone gates. We would trot through the gates a few times and then I would ask for a canter and he would canter up and through the cone gates. It was amazing the difference in his canter. He clearly found if difficult but he was focused and trying. I should mention that at this time Willy was 18 and he has some physical issues, probably from wear and tear during his racing days. When I got him at age 11, his canter was fast and he didn't have good brakes or speed control. He had improved for a few years, but then he started to have more trouble cantering and was starting to buck and be resistant to any contact at the canter. I had decided to go back and rebuild it. If we started over and he could learn to canter in balance, that would be great. If he continued to have trouble with his body then at least I would know I wasn't forcing him and I would either keep playing with it, or just not ask anymore.
When I got a round pen, I took the cone work into the round pen. I set up cone gates and clicked him for moving nicely through them at the desired gait. I taught him to go through the gate at which I was pointing with my outstretched hand. I usually set up a pattern so that once he learns it, he can set himself up. I found that while I could send him through the gates in any order at the walk, I have to plan better and give him more room at the trot or he gets annoyed. I think he needs a lot of room to get organized for a change of bend or direction. Sometimes I just have the cones set up around the outside of the pen, or use them to make a serpentine. I have used the cones to get him to move laterally out by asking him to come up and around me and then directing him out toward a cone gate. He will step out toward the outside while maintaining his bend and flexion. I can see him carefully checking to see where the gate is and adjusting accordingly. I have used the cones to mark places for transitions too. I used cones to direct him into poles I had set up to form an L. He learned to pass through the cones, into the L, out, turn and go through another set of cones and come back to me. I think the possibilities are endless. When I have time <grin>, I'd like to create a whole obstacle course and use cones to mark the path.
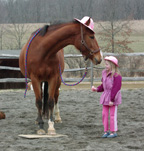
I used cones to help direct Rosie to the center of the jump when I taught her to jump loose in the round pen. She had a tendency to jump nearer to one side so I marked the approach to the jump with a cone gate and she used that to stay straight.
Since then I have used cones with several other horses, to teach them to stay out on a circle and to create more complicated patterns. To play with cones, you don't need to know how to round pen, but I think it helps. If you have never done any round pen work, I will give you some basics to get you started. There are also lots of videos and articles on how to round pen a horse. You might find them helpful if you get stuck. The key things are to learn how to handle your whip (or rope) and how to use your body (angle, position etc..) to help the horse find the right answer when you ask for something. Using the cones and the clicker gives you quite a lot of leeway in your position, but it will easier on your horse if you use consistent cues from the start.
If your horse already knows how to lunge, parts of the round pen work will be easier. It will probably be easier to send the horse out and have him keep going around the pen. However, some horses that have done a lot of lunging will find it confusing to stop for the treat, and they might react negatively to the whip when you first ask them to turn. So, I like to start as if the horse knows nothing.
When I take a new horse to the round pen, I like to him walk around for a while and look at things. I will let him loose if he is going to be calm. I do not let a horse get in the habit of going into the round pen and running around. I know this is contrary to some round pen trainers methods, but I like the horse to treat the round pen as just another place. He shouldn't come in with a set agenda. Some days I send him out, other days I work on in-hand work, or over obstacles. I want him to pay attention to me and what we are going to do instead of making assumptions. So, if I take a horse out to the round pen and let him loose and he runs like around a lot, I catch him and do something else, like head lowering or backing.
Once the horse is calm in the round pen, I make sure that he understands the whip cue means forward. Don't make assumptions about this. You should be able to have your horse halt, tap him with the whip and have him march off. Note I said "tap." It is a cue, you are not scaring your horse into jumping forward or making it unpleasant by continually tapping him. If you ask him to march off and he doesn't, then I find it helpful to ask him to move forward using another cue that he does understand. I have experimented with continuing to tap and with upping the pressure a bit, but I find that it works just as well to link the new cue (the whip) to another already known cue and then fade the original cue, and the horses seem happier about it. Alternatively, you can teach the horse that the whip means "go forward" by sending him out to a target (which could be a cone or a mat/board). I like to get the horse touching the target and then stand him back and teach him to walk forward and touch the cone or mat/board. Then you add the whip as a cue to walk forward and touch the cone. If you want to read more about this and introducing the whip for turns, read The Round Pen, part 2 in Zan's story.
So, you have a horse that is calm in the round pen, understands about the whip and some cones. You are ready to go. If your horse already knows how to go out to one cone, just add a second cone a few feet away. Click the horse for going between the cones. Then add another set of cones a short distance away. I like to walk with the horse when they are learning the pattern as I think it helps. Once the horse becomes more confident, then you can send them out ahead of you through the gates. If you set up multiple gates, make sure you click each gate occasionally so that the horse doesn't start skipping gates. Once you have your horse working through some gates, you might want to add a change of direction. For this, it helps if your horse knows about inside turns, or at least understands that when you back up, you are asking him to come in. Then you can send him out through a gate, ask him to turn and come in and then send him back out through another gate going the other direction. Changes of direction are really good for teaching horses to be supple and soft.
If you are not familiar with inside turns, here is a short description. An inside turn has 3 parts: the draw, the turn and the send. You start by sending your horse out around the outside of the ring. Let's say the horse is going left. You are holding your whip in your right hand and facing the horse's haunches to send it forward. Once you are sure your horse will keep going, back up so that you are backing straight toward the other side of the ring. As you back up, switch your whip (or rope) to the other hand behind your back. I was taught with a whip, but I would assume you do the same with a rope and just switch it to the other hand. So, you are backing up and switching the whip and being aware of how your body is angled toward the edge of the pen. You want to end up so you are redirecting the horse's forward motion toward the center of the ring. This means you have to sort of rotate your body as you walk backward. This is the "draw."
Give yourself room so that you don't feel you have to rush to get in front of the horse. Angle your body to point to where the horse's nose will be, not where it is now. You want to think of creating a diagonal wall. After you switch the whip, you extend that hand (and the whip) toward the side of the round pen. Your body, from the tip of the outstretched whip to your other shoulder is angled to create an obtuse angle with the side of the pen (anyone remember their geometry???). You are creating space for the horse to make a wide turn in front of you. The horse should see the whip and turn in. If the horse stops, you can either send him on and try the next time, or you can walk in front of him and ask him to turn. This only works well if the horse has stopped so he is turned slightly in off the rail. Don't worry if you don't get the turn, at least the horse stopped. If your horse comes in off the rail and towards you, then you have completed "the turn."
The horse is now going across the ring, and you rotate your body again so you are pointing at the horse's hip. You need to follow the horse so it completes the turn. Some horses will turn and change direction in one movement by making a semi-circle. Others will turn and cross the pen. The horse is now heading for the side of the pen and could turn either left or right. You want the horse to turn right so you need to get behind and push the hip out. At this point, some horses will change back to the left in the direction they were going before the turn. The trick is to follow the horse as it comes across the ring and point yourself at the hip so that the horse turns and goes right. If you are too far in front of the horse, you will end up pushing the nose out and the horse will turn left.
I hope this makes sense. I suggest you practice it with a friend before you try it on your horse. You certainly don't need to know how to do inside turns to play with the cones, but I found that combining the inside turns with the cones made it so that I could create more patterns and really control the path my horse took. If you can do inside turns, then you can bring the horse in off the rail, you can make circles and you can change directions. In addition, learning inside turns will teach you to be more aware of how you are controlling your space and how your horse is reacting to you. I didn't realize how much my horses were sort of crowding me in the lunging and liberty work until I really understood inside turns. There was a distance between us so I don't mean crowding as in being physically on top of me. I mean crowding as in they were coming toward me, or cutting in when I didn't want them to do it.
Here are some pictures of steps in teaching the cone gates in the round pen. Remember that you don't need to have a round pen to play with and benefit from the cones. I did a lot of cone work on a lunge line and you can also do it at liberty in a field or ring if your horse will stay with you. I think that once the horse really understands how to work the cones, it is easier to work them loose in a larger space as the cones will provide some structure for their movement. Have fun!
Step 1: walk through the cones on a lead, then off lead, click and treat between the cones
Step 2: trot off lead (you could start on lead if needed), add distance. Also, here is how I send him to a gate. I do not stand behind him as I need to direct him. I stand as shown, cluck and wait.
Step 3: canter (note the nice upward transition, slight bend and softness in his topline)
more canter work. The left is his more difficult side. As you can see, he still has his moments. The first picture is right after he picked up the canter and was headed to the cone gate at the top.
More canter work. And a glimpse of how he is starting to learn to organize himself in a more collected balance at the trot. It is really hard to get pictures as he only does this briefly and I tend to be in the way when you take a picture. He likes to offer me this trot and it will grow into something better as he gets more balance and stronger. Note that he is totally at liberty.
Katie Bartlett, 2005 - please do not copy or distribute without permission
Home | Articles | Clicker Basics | Community | FAQ | Getting Started | Horse Stories | Links | Photos | Resources
|
||||


