|
EQUINE CLICKER TRAINING..... using precision and positive reinforcement to teach horses and people |
 |
|
There are several steps in
teaching the bow. These instructions are for teaching the one knee bow where
the horse goes down on one knee (usually the left) and tucks his nose. It is
important that the horse have his cannon bone parallel to the ground to avoid
injury to the knees. Head position varies. Some horses have a preference or you
can shape it to whatever you like. Common options are with the nose touching
the knee, with the head between the front legs and parallel to the ground
(tucked behind) or anywhere in between. There are several basic steps
to teach your horse to bow. These are: The first step is to teach
your horse to stretch. (optional) The second is to teach your
horse to pick up his leg when you tap it. The third is to teach your
horse to rock back and down. Some horses will need to step back with their hind
legs after you pick up the front leg, especially if you didn’t stretch them
first. Most people use a combination of
luring the horse with a treat and rocking the horse down and back. Once your horse knows how to
bow, he will be able to rearrange his legs and you can just cue by tapping the
cannon bone and saying “bow.” If you want more detail, here
is how I have taught my horses to bow.
My methods came from Chuck Grant, Mari Monda Zdunic, Allen Pogue and basic clicker training
methods. I should mention that I do most
of my training with minimal equipment (halter and lead). However, in the case of the bow, I have used
a stirrup leather to hold the horse’s leg since I think there is some danger of
the horse becoming unbalanced. I should
also mention that I am not an expert! This is what has worked for me. So far I
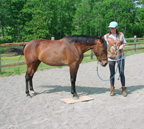
have taught 4 horses to bow, but I’m still learning. 1. Stand your horse
in a quiet location with deep shavings.
Ask him to stretch (optional).
You should be standing next to his left shoulder. I think it helps if
you are facing the horse so he does not think about walking forward.
2. Ask him to pick
up his left front leg by tapping on the front of the cannon bone with the whip.
3.
Reward him for
any lift, working up to when he is comfortable holding his leg up on his own,
or allowing you to hold it and move it slightly backwards. You can hold his leg in your hand or
sometimes I used a stirrup leather looped around so that if I dropped it, the
leg would automatically be released.
Know your horse. If your horse seems to become unbalanced, you are safer
using at least a short rope (or stirrup leather). Do not get in a position where you could get
caught under your horse if he became unbalanced. If you use a rope or stirrup leather, make
sure your horse is totally comfortable with this restraint before you proceed.
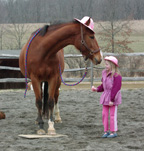
4. Once you have
your horse with his leg up and he is comfortable, start to ask him to rock
back. I taught my horses to look for a carrot at their knee. This was where I
wanted their head to end up, and it made this movement clearly different from
obeisance. Where you choose to put the
carrot is up to you, but will affect the final head position. You can use a target stick instead of a
carrot if you prefer. This is a good
idea if your horse gets snatchy. Remember, they can’t see the treat down
there. I used a target stick with my
filly. You will generally get a better
response if you use food directly, especially if you feed multiple treats to
get them to hold the position. However,
if you use a target stick, your horse will be easier to wean off the idea of
bowing without getting the treat in the “down” position. If you use a carrot, make sure it is a long
piece so that the horse doesn’t nip your fingers.
5. Move towards the
horse’s back end and gently move their leg back and down. Make sure that the
horse is dropping his shoulders down, and not just straightening the elbow
joint to allow the leg to move back. I try to keep the leg pretty well folded
at this point. It is ok if your horse moves his hind legs back. Some horses do
this to give themselves room to drop down.
Also make sure that the horse is not just reaching back with his neck
and getting his head too far underneath him. Make sure you reward for dropping
down, not just reaching back.
6. As the horse
drops lower and lower… (this will take many sessions),
work up to getting the cannon bone flat on the ground. I often make a pile of
shavings under the expected landing spot so that there is even extra padding,
and the horse has less distance to drop to the reach the ground. You want the
horse to understand that the goal is to have the cannon bone flat on the
ground. If you keep the knee angled a little down, then they won’t usually try
to stand on the bent leg.
7. Your goal is to
have the horse with his cannon bone flat on the ground and his nose tucked
between his legs, or next to the bent leg.
To get the horse to hold the position, you can train him to expect more
than one treat and he will stay down to wait for them. Some other
tips. You might want to teach your
horse to pick up his leg from a tap on the leg before you start the actual bow
practice as the padding on his leg might cause him to ignore the tap. Every horse has his own
style. Some horses will bow better if you stretch them first. You would do that prior to tapping the
leg. Other horses can learn to move the
hind legs back after you pick up the front leg. You can actually ask your horse
to back up after you lift the leg.
Eventually the horse will learn to do this on his own. The position of the back legs becomes important
for how gracefully the horse rises and is able to move off into another
movement. Some horses will kneel when
you want them to bow. Some trainers will ignore this and just stand the horse
up and ask for the bow again. I say take it!
Your horse might be confused for a while as to whether you want a kneel or bow, but once you get the communication
straightened out, you will have both. If your horse offers the
kneel and you never reinforce it, you might have trouble when you try to
get the kneel as preparation for the laydown. Remember to be satisfied with
even a little improvement in each session.
If the horse goes down too fast and scares or hurts himself, it will
take a long time to rebuild his confidence. Remember that bowing is a big
stretch for the extended leg. There are common “sticking
points” in this teaching process. If you are having problems, you can email me
with your questions. Please remember
that the bow is both a stretching and a strengthening exercise. If you think
your horse has physical limitations, you might want to teach him a modified
bow, where he doesn’t go as far down. I
would be careful of a horse that had shoulder or back issues. If the horse has shoulder issues, this can be
a good stretch if you take it slow. If the horse has back issues, then you want
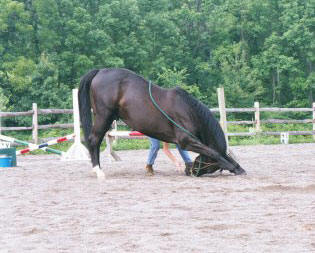
to make sure that he doesn’t hollow his back when he goes down. Have fun, Katie Here is Willy demonstrating
the finished product: 
Home | Articles | Clicker Basics | Community | FAQ | Getting Started | Horse Stories | Links | Photos | Resources
|
||||