|
EQUINE CLICKER TRAINING..... using precision and positive reinforcement to teach horses and people |
 |
|
Alexandra Kurland Advanced Clicker Clinic: August 2012 these are from facebook (the date listed is the date I posted it, the clinic itself was from August 17-20) August 22, 2012 I spent last weekend at the advanced
clicker training clinic in Groton, NY with Alexandra Kurland. As usual I came
away with some new skills and things to think about. There was not a specific
"topic" for the clinic, but there were some recurring themes. They were
self-directed vs. directed learning, using food delivery effectively, and rope
handling skills. August 23, 2012 The clinic started with some introductions on Friday night and discussion Saturday morning. The advanced clinics are always a mix of previous attendees and people who are newer to clicker training and/or Alex's work. At this clinic we had 4 new people, so at the start of the clinic Alex spent time talking about the flexibility of clicker training and how you can use it to in different ways to support the needs of the learner. She used Kay Laurence's diagram that shows how learning can move from directed to self-directed along a continuum. This is something I have written about before so if you want to read more, you can look it up in my Clicker Expo notes (in the articles section on my site.) But the general idea is that you have directed learning on one side of the spectrum, guided learning in the middle, and self-directed learning at the other end. There is no emphasis on which is "better." They all have advantages and disadvantages. In directed learning the learner is given instructions (of some kind), and there is little exploration as the steps are clearly defined. If you are teaching something through directed learning, you might use molding, luring, or physical manipulation. I think modeling would fall into this category too. Directed learning is appropriate for learning new skills where safety is a factor or for skills where procedure is important. It's also a good way to teach someone to follow directions or permit guidance. Self-directed learning is at the other end of the spectrum and includes shaping where there is minimal input from the trainer (just the set-up and the click.) The best example of this is free-shaping where the learner is encouraged to explore and guess to find the right answer. Self-directed learning is appropriate for some types of tasks and promotes puzzle solving skills and independent thinking on the part of the learner. It encourages the animal to use a different part of the brain than that used by directed learning. Guided learning is in the middle between directed and self-directed. In guided learning the learner has more freedom to explore and guess, but is also given more information and direction. Targeting is a good example of guided learning, as are some uses of pressure and release where the learner is still encouraged to be actively trying to solve the problem vs. allowing itself to be physically or otherwise directed. Alex used Kay's diagram to support the idea that clicker training covers a wide range of tools and techniques. She wants to be able to move back and forth along the continuum as needed because this gives her the most flexibility and allows her to find the right way to work with each individual horse. The important thing is to be observant and recognize the needs of the learner so that learning is a positive experience. This led into a discussion of clicker compatible tools, which is also important when putting together a training plan or system. More on that tomorrow (or the next day...). August 25, 2012 One of the good things about clinics is that they bring up subjects that you might not have revisited for a while. Since writing the last entry, I found I was paying more attention to my own training to see where I used techniques that were more about directed learning vs. self-directed learning vs. guided learning. I thought that I would probably find I was using a lot of directed learning, but it turns out that most of the time when I train a new behavior, it ends up being a combination of all three. There are very few behaviors that I train from start to finish without using some combination. The exception is if I set up a free-shaping session where I am limiting myself to self-directed learning. I also looked at how I interact with my horses on a daily
basis where I am not training new behaviors, but asking for (or accepting)
previously trained behaviors) and it was interesting to see that many behaviors
have parts where I guide the horse or expect the horse to stand while I do
something, but they also have parts where the horse does it on his own.
Haltering is a great example of this. Most of my horses come over and put
their heads in their halters, but I can also ask them to hold still and let me
put the halter on them if they are distracted or can't get their nose in the
hole. We seem to modify who does what as needed.
I think this back and forth flow between the directed side and the self-directed side of the learning spectrum is important. It allows the horse the freedom to experiment and be actively involved in the learning process, but it also means that the trainer can set up as much "structure" as the horse needs to keep him successful. It also means that there is the potential for change over time. A horse may start out needing more directed learning mixed in with little bits of self-directed learning (or vice versa), but over time this can shift so that a few months later, it works better for some other combination. August 27, 2012 In part 1, I referred to using clicker compatible tools. This is something that came up at the clinic, partly because we had some new people at the clinic who already had good horsemanship skills. The questions were why, and how, to add clicker training to their existing programs. Thinking about this is also useful for anyone who is looking to expand their toolbox and looking at other trainers and methods who are outside the clicker training community. The clicker training community in the horse world is still fairly small and many people do not have regular access to clicker friendly help so they have to become skilled at continuing their own education without compromising on their own philosophy of training. At this clinic, Alex looked at using the lead rope as a clicker compatible tool. Most of us use lead ropes and all the horses at the clinics were handled with either lead ropes or reins. Over the weekend she showed how to use a lead rope so that it was information for the horse and not used to force, scare, intimidate, or otherwise pressure the horse. To make sure we were using the lead rope in a clicker compatible way we spent time on rope handling, with the emphasis on learning to slide gently down the line and then ask for something. We also reviewed our mechanics so that we could easily slide into position to ask for the tai chi wall, going forward, or backing. We worked with people so it was easy to do lots of repetitions and get useful feedback. When you do this with a horse it's important to pay attention to how the horse is responding and I find I need to put lots of little breaks in, especially if the horse has anxiety about the lead, which many do. The person's mechanics are one part of making the lead rope a clicker compatible tool. The other part is preparing the horse so that when you do use the lead, the horse has already been practicing the behavior you want. This is important more in the early stages than later on, but I find it's always useful to have a few ways to ask for any behavior so that it is easy to change tactics if you feel the temptation to use more pressure. Here are some examples of preparing the horse. Most of the handlers were told to start in grown-ups and then walk off casually. Alex uses "walking off casually" to mean walking off without engaging the lead. The horse learns to walk off from your body cues and then once it is walking off easily, you can add a slide down the lead to accompany it. She had people do the same thing with backing. She got the horses to start backing through food delivery and then she added a lead rope cue to accompany the backing. These are all ways to introduce the lead rope once the behavior is already started and it's one way to change a horse's attitude about lead ropes. There are lots of other tools that are commonly used with horses and some are clicker compatible (if used in certain ways) and some are not. We didn't talk about general rules for clicker compatibility at the clinic but I find it's useful to have some guidelines to evaluate if you are using a tool in a clicker compatible way. A clicker compatible tool is one that is not aversive to the horse and does not shut down behavior. It gives the horse time to think and encourages the horse to experiment without fear of being corrected for wrong answers. I like to find tools that are about helping the horse figure out what to do, as opposed to tools that direct the horse away from behaviors. I am sure there are other ways to evaluate tools, but those are the ones I come up with off the top of my head. Does anyone want to add anything? August 28,2012 At this clinic there were some questions about the use of food reinforcers in clicker training. When people first look at clicker training, they often ask if you have to use food. In the horse world the use of food has been accepted by some, but more often people have been told that hand feeding causes problems and should not be done. Anyone who comes to a clicker clinic has already gotten to the point where they will consider using food in their training, but they often don't understand all the advantages of using food. Alex pointed out some of the advantages of using food. Some of these are that most horses are motivated by and will work for food, food is easy to carry with you, food can be used in small quantities, and learning to work in the presence of food is a great way to instill great manners. She also pointed out that food delivery presents many great
opportunities to get more from each click. Over the weekend she used a
variety of food delivery techniques to help the horse or handler improve some
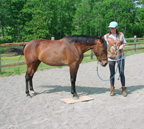
aspect of what they were doing. Here are some examples: In grown-ups, feeding "where the perfect horse would be" includes paying attention to the horse's balance. Is the horse leaning slightly forward or not standing square and over his shoulders in front? You can feed so the horse has to rock back slightly. When walking off casually, does the horse get quick and rush ahead? You can feed by asking the horse to back up as you get the food out and this will improve the horse's balance and encourage him to walk slower. She used this approach a lot and while it is very effective, it's also the one where you have to be most careful that you are not food luring or asking the horse to do another behavior after the click. The trick is to ask the horse to back as you are getting the food out so that by the time you open your hand and offer the food, the horse has already adjusted its position. When working on backing, you can feed the horse forward which means you walk forward as you get the food out so that the horse takes a few steps before you offer the food. One advantage of this is that if you are doing multiple short repetitions of backing, you can reset the horse to the starting point so that the horse does not have to back over new ground. In head lowering, you can feed low if the horse is nervous and you want to build calmness and duration. By clicking for a low head position and feeding low, all the reinforcement comes for the same behavior. In head lowering, you can feed with the head more level if you want to be able to practice asking again. Feeding higher up sets the horse up for the next repetition. This list is only a small sample of the ways that creative trainers can use food delivery to their advantage, but it should give you some ideas and show you that there are other advantages to using food that go beyond the obvious. If you have never experimented with different ways of delivering food, I suggest you read more about it before you go out and try it. There are some skills you might need to learn so that you don't frustrate your horse by suddenly things. Alex shows a lot of these techniques in her DVDs and I have written about it some in past clinic reports which are on my website. September 1, 2012 We spent time working on rope handling skills on Sunday and Monday morning. At any level clinic, it is pretty typical to spend some time reviewing basics or working out the skills needed to do a new exercise. There is always something to be learned by practicing rope handling with another person who can give you feedback on your skills. And there is also value in being asked to teach it and explain what you are doing. Reviewing rope handling is a chance to pick apart what you do so that you can relearn it and become even better. Going back and forth from doing it unconsciously to doing it consciously (think of the conscious competence model) is also useful as it makes you more skilled at going from thinking about what you are doing to just doing it. That's an important skill if you want to fine tune something you have already learned, or teach someone else. Alex emphasizes good rope handling skills as part of creating a clicker compatible tool box. She didn't stop and list the reasons at the clinic, but here are some of the reasons that have come up over the years: 1. Horses respond better to people with better rope handling skills. That may seem like it's so obvious that it's not necessary to point out, but sometimes we underestimate how sensitive horses are to tiny changes in a person's technique. Little details do make a difference. 2. The more you practice something, the more fluid and automatic it gets. In some situations, it is important to be able to slide down the line and get into position quickly (tai chi wall). If you practice enough, you will be able to slide down the line automatically (your body will do it before you brain registers that you need to do it), and this can allow you to redirect a horse very quickly. Being able to slide down a rein quickly has saved me many times. 3. Ropes are aversive for many horses. For horses who have been previously trained using rope techniques that use ropes to generate movement or shut down behavior, they need to learn that ropes are just a means of communication. The softer, lighter, and clearer you can be on the rope, the easier it will be to help them make that mental shift to the rope as information. 4. When most people first learn to use a rope with a horse, it is to control the horse. Many of us carry that tension and intent in our bodies even when the horse has become more responsive. In clicker work where the lead rope is used for information, it's really important that we learn to slide down the lead without muscle or tension so that we are not blocking feedback from our horse. In some ways, this is the human equivalent of number 3 because many people with previous horse experience also carry emotional baggage about ropes. 5. Focusing on rope handling without a horse allows you to clean up your mechanics and get rid of any extra behavior. Learning to be clean and efficient so that every action is deliberate and meaningful is important. It is so easy to let extra behavior start to clutter up your mechanics, so it's important to check what you are doing every now and then. If you want to tune up your rope handling for Grown-ups, here's one of the exercises we did at the clinic. Start with the rope coiled or looped and held in both hands at your waist. This is the position for Grown-ups. You want the part of the rope that connects to the horse to go out to the halter from the side of the loop closest to the horse. So if your horse is on your right, the rope would feed out from your right side. This is what Alex calls the "unactivated" position. She found some horses are really sensitive to the position of the rope and she uses this position to indicate "chill out, we are not doing anything yet." When you click and feed for Grown-ups, you are going to leave one hand on the line (the hand closest the horse) and get and deliver the food with the other hand. This means that as you get the food, you are stepping forward and turning to feed the horse where the perfect horse would be. It is important to stay in good balance, so if you find you are leaning to deliver the food, try moving your feet so you stay more upright. To walk off casually, you indicate to the horse that you are going to walk off (with a cue other than the lead) and the rope stays in the same position (looped and in both hands.) If you use a hand cue to indicate going forward, then the rope is held with one hand which is ok. Even though you are walking off, you have not used the lead to initiate it, so the lead just stays in the "unactivated" position. When we practiced this with horses, the handler started in Grown-ups, walked off casually, and stopped in Grown-ups, all without touching the lead. From Grown-ups, if you want to ask the horse to do something that would be considered "activating the lead," you flip the rope so the rope feeds out the other side. You have to flip the rope so that you can slide down the line with the hand farthest from the horse which is the hand Alex uses for backing or the tai chi wall.. One thing to remember about rope handling is that while Alex is very clear about the mechanics for certain exercises when she is teaching, that doesn't mean there isn't a certain amount of flexibility or room for personal choices in rope handling. Her goal is to teach the exercises in a very specific way so you start off with a clear understanding of what you need to do. If you find you need to do something differently and that works better for you and the horse, that's fine. When I came home from the clinic I took a closer look at my own rope handling skills. It turns out I feed in lots of different positions and with either hand. At first I thought "hmm, I'm going to have to clean this up and relearn all these new details," but then I realized while it may seem like I do lots of different things, I am actually pretty consistent about feeding and handling the rope in a way that is efficient and sets the horse (and me) up for the next behavior. Ok, I'm sloppy sometimes too, but my horses let me get away with it (the advantage of having experienced clicker horses!). My point here is that one way to improve your mechanical skills, become thoughtful about your food delivery, and learn to set the horse up for the next behavior, is to practice specific mechanics for different exercises. Over time you will start to develop your own feel for what works in different situations and you'll be able to easily adjust as needed. September 2, 2012 I am going to finish up the clinic notes by sharing a few other things that I found interesting and/or useful from the weekend. They are a bit random and I am sharing them in no particular order. Alex talked a bit about Jaak Panksepp's 7 Emotional Systems which are SEEKING, RAGE, FEAR, PANIC, LOSS, PLAY, MATING, and CARE. In clicker training, we activate the animal's SEEKING system. Many traditional training methods use FEAR to get behavior, whereas clicker training minimizes FEAR. This is an important distinction. Clicker training has advantages that go beyond the simple idea that we are being nicer by training with positive reinforcement and not aversives. By using clicker trainning, we are creating an entirely different emotional state in the animal being trained. Alex said that she has only one area where she requires complete stimulus control, and that is that the trainer goes into reinforcement retrieval mode as soon as she/he clicks. I think this happens more at clinics, or when working with someone else (who might be a distraction) but it's really important that the horse can see the trainer change their behavior after the click. This does not mean you have to hurry, it just means that as soon as you click, you start the process of getting and delivering the reinforcement. If you are consistent about doing this, most horses will learn to be patient because they can see that the reinforcement is coming. There are two kinds of resets. I learned that a reset was taking the nose to the offside or back to the middle (if he was overbent) and then asking the horse to back. Alex now calls this a head lowering reset because the mechanics came from teaching head lowering in the backing in a square exercise. The other kind of reset is the HSS reset which is used to redirect or rebalance a horse. Both types are useful and you should know how to do them. At one point we had a discussion about the value of using clicker training in a lesson situation. When we click on our own, we know that the clicker is useful to mark a specific behavior, and also to make it easy to build behavior in small steps because it interrupts behavior which makes it easier to focus on and identify each small step. In a teaching situation, there are a few additional advantages. If you are teaching someone and you want the student to learn to see or feel a particular behavior, you can click for them so that they can match up what they see or feel with the piece they want. Another advantage is that when a student clicks, it gives you a clear idea of what they think is a correct response so that makes it easy to tell if they recognize when the horse has met the criteria. The new people got a chance to explore a bit of lateral work and what it feels like to have a horse float on the point of contact. Alex had them feel how they could control the horse's shoulders by unfolding both arms to bring the horse up and around them. This is similar to the feeling you would get if you were directing a horse out around a cone (which she did with one horse/handler combination). Once the horse was in position, you could adjust your arms and the position of the rope to find the sweet spot where the horse is balanced and floats next to you on a point of contact.
|